
How to Build a DIY Video Wall with Digital Displays
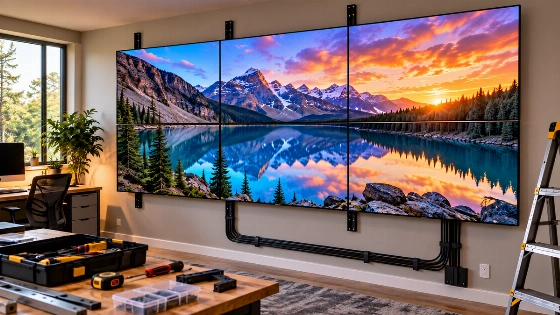
A video wall does not have to be limited to control rooms or large commercial spaces. With the right screens, mounts and video hardware, several displays can be combined into one large image for a home setup, office, showroom or event space.
The difficult part is not simply hanging several monitors next to each other. A good video wall needs correct alignment, stable signal delivery and matching color across every panel.
Plan the wall first
Start with the size and layout. Decide how many screens you want, whether they will sit in a 2x2, 3x2 or another arrangement, and what resolution the complete wall should provide.
Also think about viewing distance, room lighting and the content you plan to show. These choices affect screen size, brightness and placement.
Choose matching displays
Using identical screens makes the build much easier. Matching models usually have the same resolution, brightness, color characteristics and bezel size.
Thin bezels are useful because they reduce the visible gaps between panels. Brightness matters too, especially in rooms with strong ambient light.
Prepare the mounting system
Precise mounting is essential. Each display must sit level with the others, with consistent gaps and enough space for ventilation.
Use mounts designed to support the weight of the screens. Before drilling, check the wall structure and cable routes. A small alignment error becomes very obvious once several panels are placed together.
Connect the video source
A computer, media player or dedicated video processor can feed the wall. The exact setup depends on whether every screen shows separate content or all displays work together as one large canvas.
For larger layouts, a video wall controller or processor can divide one source image across multiple outputs. HDMI, DisplayPort and suitable adapters may be required depending on the screens and source device.
Configure the content
Once the hardware is connected, configure the operating system or video wall software. Set the correct screen order and resolution, then test whether the image lines up correctly across panel boundaries.
Commercial setups may use dedicated content management software. A simple home installation can often run from a PC or compact media system.
Calibrate color and brightness
Even identical displays can look slightly different. Adjust brightness, contrast and color temperature so one panel does not appear brighter or warmer than the next.
Built in controls may be enough for a basic setup. More demanding installations can use a calibration tool for closer color matching.
Add sound if needed
If the wall is used for movies, presentations or events, audio needs its own plan. External speakers are usually better than relying on several display speakers at once.
Keep audio and video synchronized and make sure the selected source sends sound to the correct output device.
Consider remote control
A video wall becomes easier to use when power, brightness and content can be controlled remotely. Smart home systems or dedicated management software can handle basic automation.
This is especially useful for displays installed high on a wall or in commercial spaces where content changes often.
Keep the system maintained
Check cables, mounts and ventilation regularly. Dust around vents can increase heat, while loose connections may cause intermittent signal problems.
Software and media players should also be kept current. If one screen begins to show different colors or brightness, recalibration may be needed.
Build for consistency
A successful DIY video wall depends more on precision than complexity. Matching displays, solid mounts, clean cable management and careful calibration make the biggest difference.
Plan those parts before installation and the finished wall can look much closer to a professional system without requiring a fully custom commercial setup.