Ever since you got your hoverboard, it has brought you endless hours of joy. You’re not the only one – the market for this fun toy has exploded, with solid growth expected through to 2024. But, now it’s decided to break on you – crap! What now? After all, it’s not like you can take your unit down to the hoverboard dealership.
You could send it away for repairs, but why do that? If you’re mechanically inclined, you can save yourself loads of time AND money by fixing it yourself. In this post, we’ll run down the most common repair issues hoverboard owners face, and how to fix them.
Replacing Your Hoverboard Battery
Battery issues are the #1 repair issue you’ll encounter as a hoverboard owner. The average hoverboard battery offers 1-4 hours of riding per charge, and each battery is usually good for about 500 cycles.
Like any consumer good, though, your mileage may vary. Sometimes, a specific battery is defective, causing it to die much sooner than expected. Using a reliable hoverboard battery is important, so always use brands recommended by the manufacturer.

However, even a quality battery will eventually wear out. When it stops holding a charge, replace it ASAP – if you don’t, dangerous battery malfunctions can occur.
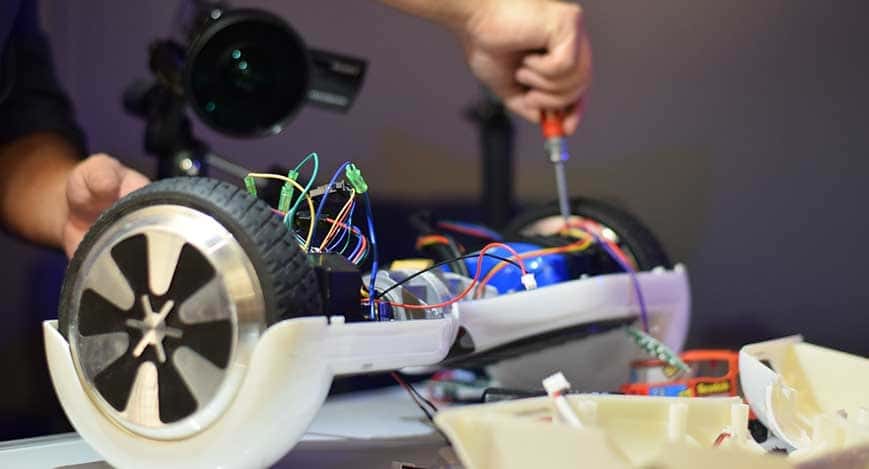
When the time comes to change it, start by unscrewing the plate on the bottom of your hoverboard. Then, remove the screws anchoring the dead battery to the frame. Unplug the dead unit, and plug in the fresh battery. Re-anchor the new unit to the frame, then re-secure the plate on the bottom of your hoverboard.
Then, power it on to see if everything works. Congrats – your favorite toy is alive again!
Fixing Flat Tires
Oh no! You drove your hoverboard over broken glass. Now, your left tire is as flat as the pavement upon which it sits. Not to worry, though – 15 minutes of effort, and you’ll be back on the road.
However, you’ll need to make some preparations beforehand. In your home workshop, stockpile some spare 10” hoverboard tires and tubes. You’ll also need two flathead screwdrivers and a pair of mechanic’s gloves to carry out this repair job
Ready? Start by placing your unit on its side, with the damaged wheel facing up. Then, remove the end cap from the flat tire’s valve stem, and completely deflate it. Now, it’s time to remove the tire from the frame. Take the first flathead screwdriver, insert the business end under the tire, and pry the rubber off the rim. Insert the second flathead and move it across the rim, all while continuing to lift the tire. This technique should separate the tire enough to allow you to pull the rest off using the mechanic’s gloves.
Now, it’s time to put on the new tire. Start by inserting the valve stem into the rim. Then, insert the tube into the new tire housing. Once it is ready, push the tire onto the rim. After it goes over the lip, use your flathead screwdrivers to secure and stretch the tire over the rim. Ensure the tire is radially centered before inflation, as improper centering can lead to dangerous situations later on.
Changing Wheels

Over time, wear & tear will do a number on any vehicle – your hoverboard is no exception. After hours of taking bad bumps, your wheels may need replacing.
If operational issues (like the hoverboard not centering correctly) don’t clue you in, your warning lights will. If they flash red five times, you’ll need to swap out the wheel on the battery side. If it flashes red four times, the one opposite the battery needs to go.
Start by removing the bottom plate on the relevant side. Unplug all wires from the plate, and place it aside. Then, unplug the cables attached to the wheel, but be sure to make notes about which cable goes where. Next, remove the screws anchoring the wheel to the frame. However, these screws are bigger (six-millimeter hex nuts), so ensure you have the correct attachment in your drill set before beginning.
After taking the bad wheel away, replace it with the new wheel. Place the six-millimeter hex nuts back in place, but mind the tightness at first – this will make adjustments easier as you go. Re-plug the cables into the appropriate ports, and then screw the rear plate back on.
If this process seems complicated, don’t worry about it. On YouTube, you’ll find videos that will guide you through the entire process.
Broken Frames
If someone too heavy for your unit takes one too many rides on it, your hoverboard frame can bend or break. When this happens, riding can become dangerous. If your hoverboard refuses to rotate/rotates 360 degrees on its own, these are also signs of frame damage.
In any of these cases, you’ll need to order a new frame, unplug/unscrew all internal components from the old frame, and transplant them into the new unit. If that sounds like too much work, just send it back to the manufacturer. That way, you’ll ensure this laborious repair job is done safely.
Keep Your Hoverboard In Good Working Order
Dealing with broken stuff is a pain in the butt. If you’re handy, though, you can save money and time by repairing your hoverboard at home. By following the advice in this article, your toy will be up and running again in no time.


GREAT article, thank you. You addressed your audience PERFECTLY, providing a quick rundown summary on the market options for those of of use looking at these devices.
I’m over 40 and more than comfortable with several of the options on the list, but then again I know that I can’t speak to the abilities of everybody in the world in my age group.
Someone send John Turner some bubble wrap and a Hoveround. I’m looking at Segways…