
In this article, I’m going to cover step by step how to make a partition for a USB using the best USB Partition Manager. And, if you’re reading this article, hopefully it means that you’re looking for something related.
Day by day, the cost of the USB external drive is decreasing in a rapid manner, which is growing their demands for storage purposes. Rrather than purchasing a new hard drive, people are willing to manage their data through USB drives and partition management software (like partition manager bootable usb). For HDD manufacturers, this is their worst nightmare! To have fully functional, usable USB drives that can store as much data as an HDD AND have it be partitioned??
The USB drive won’t be partitioned to start. To troubleshoot this problem, a third party app or software manager is often required if you want to do more than just create new folders. This USB partition manager is an edition in which you will be able to manage the USB drive in an easy to access way. It doesn’t require any sort of external storage. With this type of technology, one can easily store their files in the external drive and enjoy their marvelous experience while managing the Resizing factor, Copying element, Merging section, creation of data and files, and even deleting partitions you decide you don’t want.
It can easily be conducted, especially in order to expand your NTFS partition file without trying to reboot it. You can also get a copy of the dynamic disk, which is considered to be one of the better elements.
Some of the steps which have to be followed while using the USB related partition drive are as follows:
1. In order to rescue data from accidental deletion, users can utilize the copy of a partition of this type of drive in order to provide a back-up data analysis.
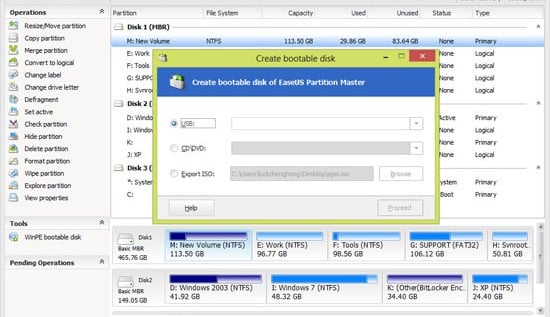
2. First you have to launch the file in which you want to store the partition.
3. Make a wise choice while selecting which drive you want to reset and then after the selection, click on the option of Partitions. You will then see a dialogue box opening in which two buttons exist: the reset button or the move button.
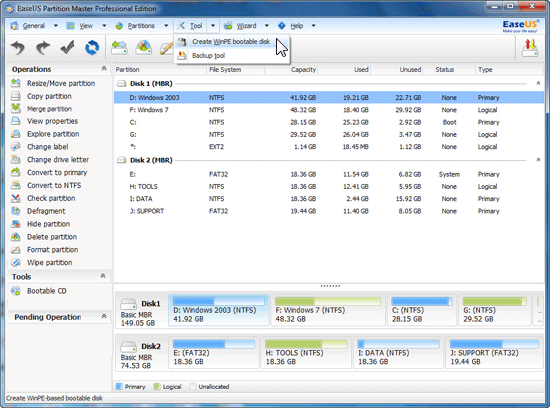
4. In the map of the disk, the present size of your partition will be viewed right in the top of the dialog box that appears. The map even projects the amount of space utilized inside the partitioedn disk as well as you can view that space which is free in the surrounding areas. This may be temporary because it will exist only if there is some space available near the surrounding areas. The least and the most fixed sizes which you want to change is available beneath the map.
5. Place your mouse pin in the preferred place where you want to change the settings. For example, if you want to expand the space in the left side, then click on that left side button or if you want to change or expand the space in the right side button, then click in the right button so as to increase or decrease the size as per your choice.
6. Then your mouse pin will appear to change into a double-sided arrow. This means that your click is in processing stage and you will have to wait for some time to load.
7. Trail the handle to that part of the partition of size which you are wishing to change and then wait until a dialog box appears.
8. Then after the processing is over, click on the OK button. This ensures that your process is fully complete.
So give a try to one of this best partitioning software to make partition for USB and let us know whether tool is helpful to you or not.