
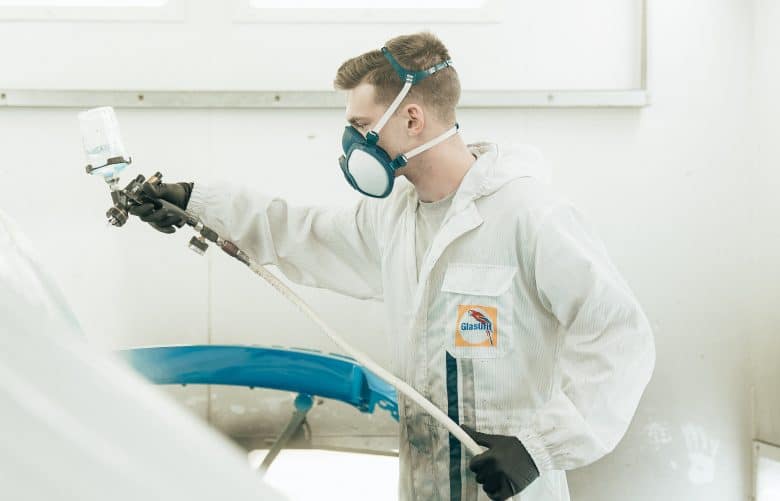
When it comes to the types of painting techniques out there, nothing offers more versatility than spray painting. From wood, medium-density fiberboards (MDF) and particle boards to different types of glass, fabric, metal, masonry and uPVC, there is a spray paint for every type of surface. Getting the desired finish from a spray painting project requires a good level of skill and expertise that you will mostly find with professional spray painters like PBM Paints. However, if you wish to do things by yourself, below are some tips to help you improve the quality of your project.
Surface Preparation is key
The type of preparation you carry out plays an important part in the outcome of your spray painting project. Proper surface preparation ensures a professional-looking finish that will not fade or wear off easily. Surface preparation should start with a thorough cleaning to ensure that the surface is free from dirt, grime and all other finishes. Soapy water should be enough to clean most surfaces.
Once cleaning is complete, the next step is to sand the surface thoroughly to remove any other finish. Sanding also aids in better adherence of the spray paint to the surface. You can use a power sander or a sanding sponge (better for irregularly-shaped pieces) for this. After sanding up to about 150 grit, use a tack or microfiber cloth to completely remove all dust particles.
The surrounding area and any part of the piece you don’t want painted should be taped off before you start spraying. You can use painter’s tape and some old newspapers for this.
Don’t Forget to Prime
It is important that you prime any surface before spray painting. This is to ensure that the paint adheres well to the surface. It also improves the quality of the finished product. If you feel like priming separately before painting is a lot of work, opting for a two-in-one paint/primer combo also works. However, the best way to prevent the bottom colour from showing through your finished product is to use a separate primer.
Check the Weather
Humidity can affect the way your paint adheres and dries, so be sure to check the weather before you start spray painting (especially for any exterior spray painting). Ideally, the temperature range for spray painting is between 50 and 90°F, and spray painting shouldn’t be done when it’s too windy or rainy. Humidity levels of 40-50% are also ideal.
Contain Overspray
During spray painting, a good amount of your paint will end up floating through the air and landing in unwanted places. This is known as overspray and there are a few things you can do to contain it. First is to get yourself a spray shelter or spray tent. These spray tents come in different sizes and the one you get depends on the size of the piece you are painting. These tents can help keep overspray contained while also protecting your painted piece from any landing (bugs, debris and dirt) as it dries.
While using a spray tent, you can also put it in a wooden turn table to make it easier for you to reach all parts of the piece while spraying.
Ventilation is Important
The fumes from spray paints can be combustible, so it is important to properly ventilate the room if spray painting is being done indoors. Keep all windows open and put a fan by the door if possible.
Painting the Right Way
During spraying, there are a few tips and tricks you can use to achieve a professional finish and they include:
- Shake the paint can for 2 minutes before you start spraying. This is to mix the paint and disperse the aerosol propellant throughout the paint.
- Use a spray paint can handle for better control of the spray.
- Test spray on a piece of paper or cardboard first. You can do this by holding the can at about 10 inches away from the surface. If you notice the paint starting to pool instead of light, even mist, then you are probably standing too close.
- When spraying, start off to the side, then move slowly in a level line across the surface till you pass the opposite edge. Avoid making an arc with your arm as this will only make the paint thicker in the middle and lighter at the sides.
- Never change direction halfway through or start and stop spraying at the middle of your piece. However, you can start the second coat of paint in the opposite direction of the first.
- To prevent paint from running on vertical surfaces, apply a tack coat. Do this by holding the can further back from the surface and lightly misting the vertical parts. Allow this coat to dry for some minutes before returning to normal spraying.
- Allow a few minutes of drying between coats. Some paint cans will have instructions on how many minutes you need to wait before applying a second coat of paint. You should be able to get a full and even coverage after about 2-4 coats, however, the texture and colour of the surface you are painting are factors to consider.
Conclusion:
Spray painting is a great way to transform the appearance of any surface. However, achieving a professional finish can only be achieved with adequate preparation and the right technique. Hopefully, the tips above will help improve the quality of your next project.